Hey Guys!
I’m so excited to end the year off right by participating in the Silhouette Challenge Group! I found this group on a whim and now have the chance to take part in the grand finale — the Holiday Challenge!

This Month’s Theme
HOLIDAY!
No matter what holiday you celebrate this time of year, we’d love to see how you use your Silhouette to tackle a holiday or winter-related project. DIY gift wrap, handmade gifts, holiday décor…it all applies!
Optional bonus challenge…
STRIPES
Work some snazzy stripes into your holiday project this month and you earn the title of multi-tasker extraordinaire!
Challenged Accepted!

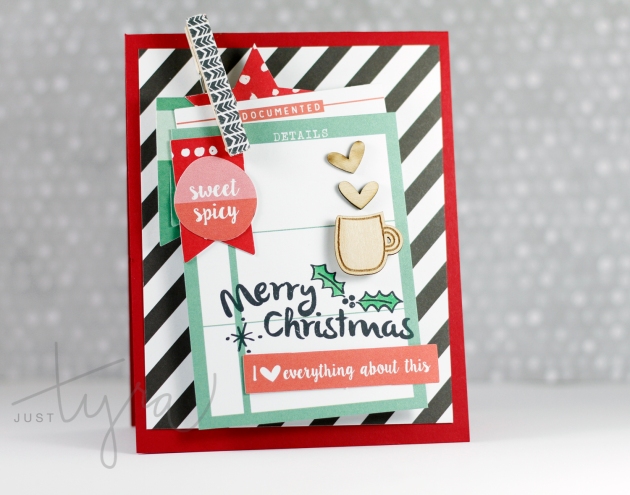
This project is so so cheesy easy using my silhouette portrait! I created a holiday ornament gift box thats versatile to use as a teacher gift, party favor or to decorate your tree!
Tutorial
Step 1. Select Patterned Paper. I choose paper from a 12 x 12 holiday themed paper pad so I didn’t have to think about coordinating patterns or colors! The holidays are busy enough!
Step 2. Select Design. I selected Lori Whitlock’s “3d box ornate band christmas tree ornament” from the Silhouette Store! It’s Design ID #34921 and on currently sale for 75 cents!
Step 2. Arrange and cut design in Silhouette. This design consists of two cut files and I planned on creating more than one ornament so I ungrouped the two cut files. I selected the outer filigree-like cut file and made three copies of it onto an area sized to 8.5 by 11 inches (standard paper size) and cut the pattern out. I selected the coverstock setting since my paper is 80 pound coverstock and made a few adjustments to the cut settings: Speed: 1 / Thickness 33 / Double Cut.

I cut the box onto a coordinating patterned paper. Notice that the design doesn’t perfectly fit onto the area (also sized to 8.5 by 11 inches) but that’s completely okay! That section will remain uncut and you case use scissors to finish cutting the edge. This edge is eventually folded and hidden on the inside of the box! Cut this box three separate times.

The holiday paper pack I selected included an assortment of sentiments, so I cut one out and added the sentiment to the front of the ornament. I used strong double-sided adhesive tape to close and seal the ornament. This is especially important when you add a tasty treat inside. No spoiling the surprise!
Let’s take a Look at this fun ornament again, shall we?
Want to Check Out More Silhouette Projects?
My Silhouette Challenge buddies and I are all sharing projects on our blogs today, so peruse the projects below for a wealth of Silhouette inspiration!

1. Beauty in the Mess // 2. JustTyra // 3. Dream a Little Bigger // 4. Simply Kelly Designs // 5. The Stamp Doc // 6. From Wine to Whine // 7. TheKimSixFix // 8. unOriginal Mom // 9. HaberdasheryFun // 10. Tastefully Frugal // 11. Sisters, What! // 12. Small Stuff Counts // 13. Where The Smiles Have Been // 14. Whatcha Workin’ On? // 15. Designed Decor // 16. Architecture of a Mom // 17. Decor Adventures // 18. Create & Babble // 19. Tori Grant Designs // 20. Tried & True // 21. The Thinking Closet // 22. Creative Ramblings // 23. Get Silvered // 24. McCall Manor // 25. Cutesy Crafts // 26. Ginger Snap Crafts // 27. My Favorite Finds // 28. Cupcakes&Crowbars // 29. Pineapples & Pinecones // 30. The Crafting Nook // 31. It Happens in a Blink // 32. Alayna’s Creations
Silhouette Giveaway!
There is also a fun giveaway being hosted by the Silhouette Challenge Group. Click HERE for the deets!
Thanks so much for stopping by! Sending you off with Crafty Wishes and Washi Tape Dreams! xo, Tyra